In our ever-busy lives, the kitchen often becomes the heart of our home, a place where meals are prepared and memories are made. Thus, having a well-stocked pantry can make the difference between a stressful cooking experience and a delightful one. This article will guide you through simple yet profound food rules that will transform your pantry into a treasure that inspires your culinary adventures.
Store What You Eat and Eat What You Store
The first step is to understand what you and your family enjoy eating and what you consume regularly. Observing your eating habits over a period can help you identify which staples you reach for time and again. These insights are invaluable when selecting items for long-term storage, ensuring that every item in your pantry has a purpose and a place in your meal planning.
Storing foods that are already part of your regular diet helps reduce food waste by ensuring you use these items before they expire. It also saves you money by avoiding impulse purchases because you buy what you truly use instead of tempting discounts. Additionally, having a stock of familiar foods can provide comfort and a sense of normalcy in times of emergency or when you cannot shop frequently.
Store Food at the Right Temperature.
Storing food at the right temperature is crucial not only for preserving its freshness and flavor but also for ensuring our health and safety.
Foods that require refrigeration should be placed in the fridge as soon as you get them home. According to the US Food and Drug Administration (FDA), you should keep the refrigerator temperature at or below 40° F (4° C) and the freezer temperature at or below 0° F (-18° C). It’s also recommended to check the temperatures periodically with appliance thermometers. Besides that, follow the “two-hour rule” for items needing refrigeration: do not leave them out at room temperature for more than two hours.
Remember that some types of food may need refrigeration once you’ve opened them. Therefore, it’s important to follow the storage instructions on the label.
Here’re some useful resources to help you store your food properly and safely:
https://www.fsis.usda.gov/food-safety/safe-food-handling-and-preparation/food-safety-basics/shelf-stable-food
https://ohioline.osu.edu/factsheet/HYG-5401
https://www.foodsafety.gov/food-safety-charts/cold-food-storage-charts
https://food.unl.edu/free-resource/food-storage
https://www.foodsafety.gov/keep-food-safe/foodkeeper-app
Keep All Food Storage In A Clean, Dry, Cool and Dark Place

The reason for keeping all food stored in a clean, dry, cool, and dark place is to ensure their longevity, nutrition, and safety.
- Keep It Cool: Warmer temperatures accelerate the spoilage of food by promoting the growth of bacteria. As temperatures rise, microorganisms, enzymes, molds, and yeast can grow more quickly. Keeping foods in a temperature range of 50-70°F helps preserve their freshness and extend their shelf life.
- Keep It Dry: Moisture is a catalyst for mold and bacteria growth. Storing food in a dry place ensures that the integrity of the food and its packaging is maintained, preventing degradation and contamination.
- Keep It Dark: Light can cause photo-degradation, affecting the nutritional value and the flavor of food. Foods exposed to light can also experience changes in their chemical structure, leading to spoilage.
- Keep It Clean: A clean storage environment prevents infestations of pests and insects, which can contaminate food and spread disease. Regular cleaning and maintenance of storage areas also help monitor the condition of stored foods and manage inventory better.
Some key reminders:
- Dry Staples: Flour, sugar, pasta, and rice are prime examples that need to be appropriately stored to prevent them from absorbing moisture and becoming breeding grounds for pests.
- Canned Goods: Although canned goods are less susceptible to light due to their metal containers, they should still be kept in a cool and dry place to prevent the risk of rusting, which can compromise the seal and safety of the food inside.
- Spices: Spices lose their potency and flavor when exposed to heat and light. Storing them in a dark, cool cupboard ensures they retain their flavor and therapeutic properties.
- Oils: Oils, especially those rich in unsaturated fats like olive oil, should be stored away from light and heat to prevent oxidation and rancidity.
- Root Vegetables: Items like potatoes, onions, and garlic should be kept in a dark, cool environment to avoid sprouting and decay.
Save this practical, handy guide whenever you’re in doubt:
https://bookstore.ksre.ksu.edu/download/safe-food-storage-the-cupboard_MF3131
Separate Food
“Raw meat or poultry should never be stored alongside fresh vegetables or fresh fruit,” Molly Gordon, a chef in Charleston, South Carolina, says to Southern Living. According to the US Food & Drug Administration, raw meat, poultry, seafood, and eggs must be separated from other foods in your grocery shopping cart, grocery bags, and refrigerator. Besides that, keep eggs in their original containers and store them on the coldest shelf possible (bottom shelf) inside your fridge—and not in the refrigerator door.
See more tips for separating food here.
In addition, there are certain foods that You Should Never Store Together. “In general, don’t store ethylene-sensitive fruits or vegetables with fruits or vegetables that produce a high amount of ethylene gasses,” says John Adler, the vice president of culinary at Blue Apron. ( stated in Martha Stewart’s article). Following are some basic rules:
- Keep bananas away from other fruits as they emit a high amount of ethylene, which can cause nearby fruits to ripen too quickly.
- Ethylene producers vs ethylene sensitive shouldn’t be stored together.
- Store Onions and Potatoes separately. Onions can cause potatoes to sprout and spoil more quickly due to their moisture content and ethylene gases.
- Store melons separately to prevent their ethylene gas from accelerating spoilage in other produce and avoid the transfer of their strong aroma.
- Adversely, storing mushrooms separately prevents them from absorbing moisture and strong odors from other produce. The best way to store them is to put them in a paper bag or wrap them in a paper towel inside a partially open plastic bag.
For a deeper explanation, you can read these articles:
https://www.marthastewart.com/8296471/fruits-vegetables-never-store-together
https://www.southernliving.com/foods-never-to-store-together-7568193
https://www.express.co.uk/life-style/food/1700518/food-storage-fresh-fruit-vegetables-overripe-tips-hack
And save this handy guide to use whenever you’re in doubt:
https://ucsdcommunityhealth.org/wp-content/uploads/2017/09/ethylene.pdf
Organize Your Pantry in the Way That You Can See What You Got
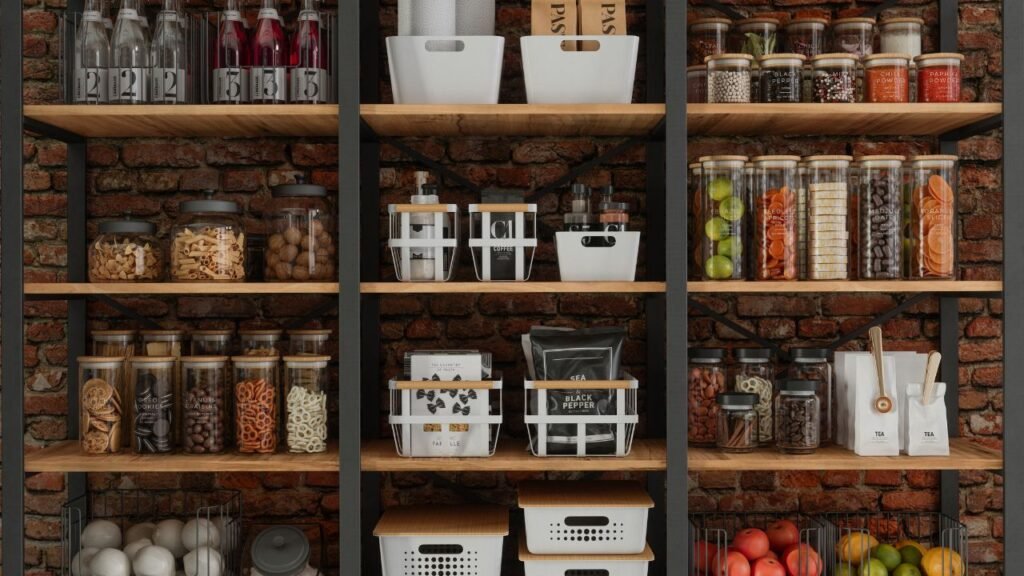
When organizing your pantry, the adage “out of sight, out of mind” holds particularly true. Ensuring everything in your pantry is visible at a glance helps you utilize what you have before it expires. This visibility enables you to reduce food waste and make the most of every purchase.
Position the items you use most frequently at eye level or in an easy-to-reach place. This setup helps you find ingredients without even looking, minimizing the time you spend searching through your pantry. For instance, keep your oils, spices, and frequently used condiments within arm’s reach.
Heavy and bulky items like cans and large bags should be stored at a manageable height to prevent accidents, such as dropping them on your toes. Conversely, rarely used items should be placed on the top shelf. While these are less frequently needed, they shouldn’t be forgotten. Periodic checks will help you keep track of these items before they expire.
Rotate Your Items
The first-in, first-out (FIFO) system is fundamental in both professional kitchens and supermarkets. It ensures that the older items are used before the newer ones, maintaining freshness and reducing waste. The essence of FIFO is to always place newly purchased items behind the older ones, so the oldest products are at the front and used first.
Arrange your pantry, fridge, and freezer so items with the earliest expiration dates are at the front. Every time you come back from grocery shopping, take a few minutes to move older items forward and place new items at the back. This small step ensures you use up the older products first, keeping your food fresh and reducing waste.
For FIFO to work effectively, date-marking your items is crucial. Use a marker to clearly label each item’s purchase date or expiration date. Maintaining the FIFO system requires regular attention. Each time you receive new groceries, take a moment to re-arrange your shelves.
Let’s walk through a practical example using pasta. Suppose you love pasta and typically cook it twice a week, using one box per meal. Instead of buying four boxes of pasta on your bi-weekly grocery trip, you buy six. When you return home, you place the newly bought boxes behind the existing ones. Over the next two weeks, you use up the four older boxes; when you go shopping again, you still have two boxes left. You then buy another six, placing the new boxes behind the remaining two. This way, you continuously build a surplus while ensuring the older items are used first. In any emergency, you’ll always have extra supplies of the foods you love and regularly use.
Implementing the FIFO system at home ensures you always have fresh items on hand, reduces the risk of food waste, and helps maintain a well-organized pantry. In emergencies or busy schedules, having a well-stocked pantry with a reliable rotation system can provide peace of mind, knowing you have what you need without the anxiety of last-minute shopping trips.
Use Airtight Containers

Using airtight containers not only extends the shelf life of your food but also helps maintain an organized and visually appealing pantry.
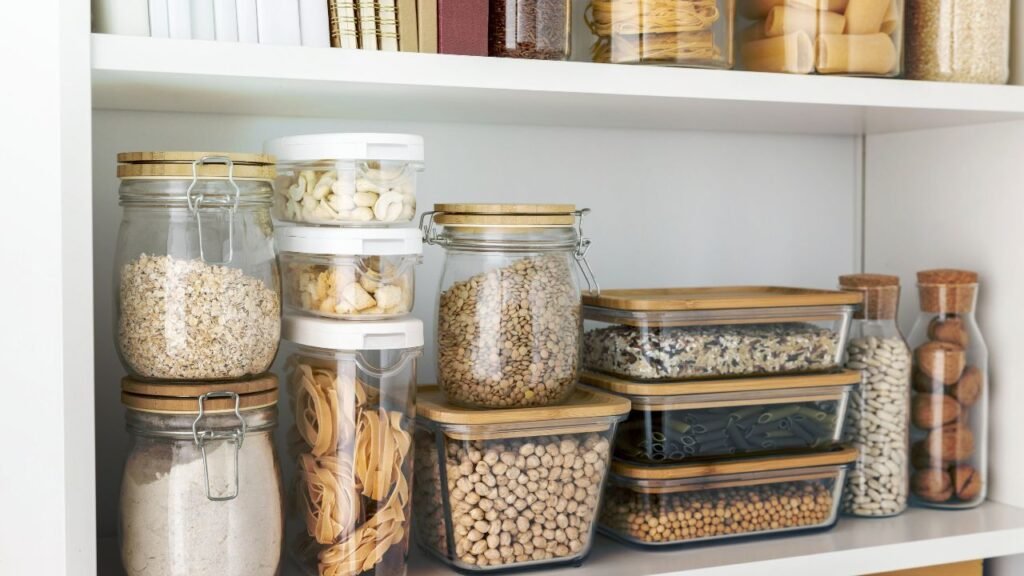
Containers, whether glass or plastic, create an airtight environment, which significantly slows down the oxidation process that leads to food spoilage. These containers help prevent food from becoming rancid, moldy, or discolored by minimizing exposure to oxygen. This is especially important for dry goods such as flour, grains, and nuts, which can quickly degrade when exposed to air. Besides that, opting for transparent containers will allow you to see your supplies and keep track of what’s still in stock. You can also quickly detect any moisture build-up, which can spoil dry goods. Therefore, you can use the affected food immediately or take steps to repackage it.
All dry goods are recommended to be stored in airtight storage containers to maintain their freshness and prevent pest infestations. These include:
- Flours: Any flour, such as all-purpose, whole wheat, or specialty flour.
- Grains: Rice, cornmeal, and other grains.
- Cereals: All types of breakfast cereals.
- Dried Fruits: Any kind of dried fruit.
- Dry Pasta: All varieties of dry pasta.
- Chocolate and Cocoa: Chocolate chips, baking chocolate, and cocoa powder.
- Tea and Coffee: Loose-leaf tea, tea bags, and coffee beans.
- Herbs and Spices: Dried herbs and spices.
- Legumes: Dried beans, peas, and lentils.
- Seeds: Any kind of seeds, including chia, flax, and sunflower seeds.
Practical Tips for using containers in your pantry
- Decant Dry Goods: Transfer dry goods such as flour, sugar, pasta, and rice into clear, airtight containers. This extends their shelf life and helps you keep your pantry organized.
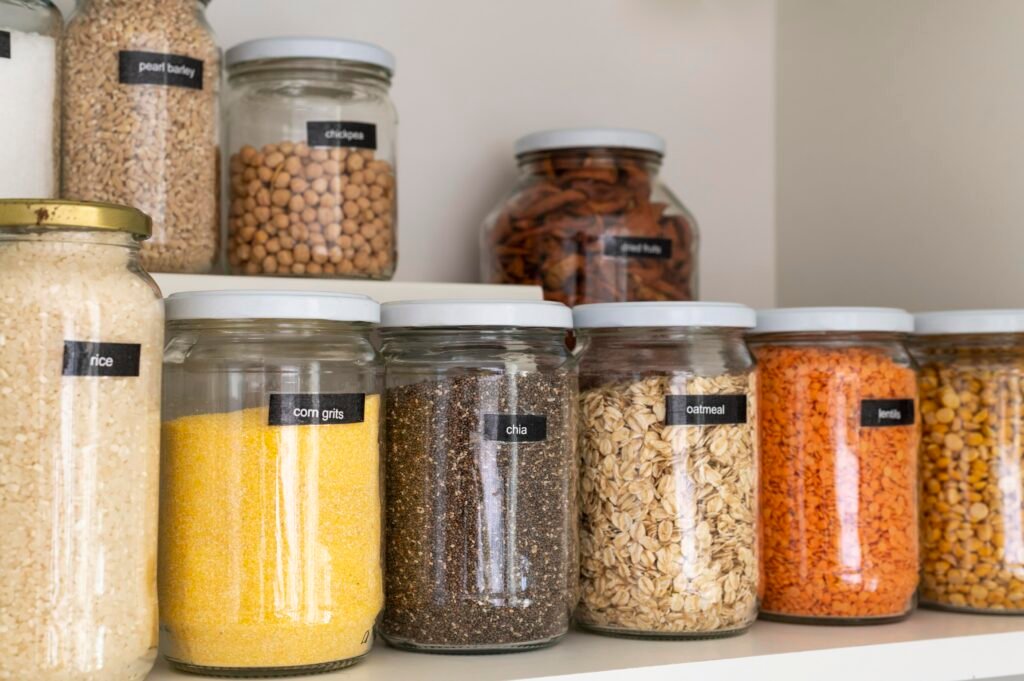
- Label and Date: Clearly label each container with the contents and the date of purchase or expiration. This practice helps you keep track of freshness and ensures you use the oldest items, following the FIFO (first-in, first-out) principle.
- Group Similar Items: Use clear containers to group similar items together. For example, keep all your baking supplies in one section and your breakfast cereals in another. This organizational method makes it easier to find what you need and keeps your pantry tidy.
- Reuse and Recycle: You don’t need to buy expensive storage solutions to start. Mason jars, resealable plastic bags, and used glass jars like condiments and jam jars can all serve as excellent, cost-effective storage options.
Consider how you might store grains like rice. Instead of leaving them in the flimsy original packaging, transfer the rice into a large, clear, airtight container. This protects the grains from moisture and pests while making it easy to see how much you have left. When you use the rice, you can quickly spot any potential issues like moisture or pests and address them immediately.
Label Everything

Labeling your containers is a critical step in achieving an organized pantry. Clear and concise labels help you quickly locate your ingredients and keep your pantry tidy and efficient.
Clearly marking your containers with the contents and the date of storage or expiration helps you easily track what you have and how long it’s been there. This practice helps prevent food waste and ensures nothing gets lost or forgotten at the back of your pantry.
Steps to Implement a Labeling System
- Label All Containers: Every container in your pantry should have a label indicating what’s inside and, if applicable, the expiration date. A quick glance will tell you exactly what you need, saving you time and reducing the chances of misplaced items.
- Use Clear Labels: Whether you opt for a Bluetooth label maker, chalkboard labels, or simple masking tape and a Sharpie, ensure your labels are easy to read and update. Clear labels make it easier for everyone in the household to find what they need and to put things back in the correct spot.
- Categorize and Organize: Group similar items together and label their storage areas. For example, create sections for baking supplies, snacks, canned goods, and spices. This makes it easier to find items and keeps your pantry looking neat and uniform.
Benefits of Pantry Labels
- Save Time: A well-labeled pantry allows you to locate items quickly, whether cooking a meal or grabbing a snack. No more rummaging through unmarked containers and packages. When everything is clearly labeled, you can instantly find what you need.
- Reduce Food Waste: Labels with expiration dates make it easy to see what needs to be used up soon. Regularly scan your pantry to identify items nearing expiration and plan meals around them. This practice helps you use food while it’s fresh and prevents it from spoiling.
- Prevent Duplicate Purchases: With a transparent labeling system, you have full visibility of your pantry’s contents. Before heading to the store, take a quick inventory to avoid buying items you already have. This saves money and reduces the clutter of duplicate ingredients.
- Simplify Meal Planning and Shopping: Planning your weekly menus and shopping lists becomes much easier when your pantry is well-organized and labeled. You can quickly see what you have on hand, utilize them in your recipes, and identify what needs to be restocked.
Keep a Running List and Audit our Pantry Regularly
A simple white dry-erase board on your pantry door can serve as a quick reference inventory. While not comprehensive, it should list essential items or those that are running low. This strategy helps make informed grocery shopping decisions, ensuring you only buy what you need, thereby reducing excess spending and minimizing food waste.
A well-audited pantry helps you create better meal plans because you’ll know exactly what you have, which items you use frequently, and what needs to be added to your grocery list. Instead of starting from scratch each time you plan your meals, conducting a pantry audit makes the process effortless. Here’s how to do it:
- Prepare Your Tools: Grab a pen, notepad, or even your smartphone to take notes. Having containers ready for reorganizing items can also be helpful.
- Inventory Your Items: Go through your pantry item by item, writing down everything you have. Take note of the packaging type (plastic bag, paper bag, glass jar, etc.) and the quantity.
- Categorize Usage Frequency: Record how often you use each item with a simple scale:
- Daily to weekly (high use)
- Monthly or less (low use)
- Never or rarely (dead stock)
- Identify Dead Stock: Look for items you never use or have been sitting in your pantry for a long time. Consider donating or disposing of these to free up space.
- Analyze and Act: Once you have your data, analyze it to determine what changes you need to make. Focus on items you use frequently and ensure they are always stocked while reducing or eliminating dead stock.
To keep your pantry in top shape, plan to perform mini-audits each week while making your meal plan. This helps ensure that snacks are stocked, ingredients are plentiful, and you have a comprehensive grocery list for the week ahead. Regular audits prevent your pantry from becoming chaotic and help you stay on top of your inventory.
Final Thoughts
Mastering the art of stocking a pantry is more than just filling shelves—it’s about creating a harmonious space that supports your lifestyle and dietary needs. These simple food rules in this guide ensure that your pantry meets and anticipates your culinary needs. Remember these tips as you stock and manage your pantry, and enjoy the peace of mind that comes with being well-prepared and well-fed. Happy cooking!
